Developer PC Setup
Developing MPages with Clinical Office:MPage Edition and Angular requires the installation of some freely available software as well as a free GitHub and npm.js account. This software should be installed on the PC or Mac that you plan on using to develop your MPages.
Ideally the PC/Mac you develop your MPages on should be able to access the Discern MPages web service by either being located on the hospital network or through VPN access. Discern MPages web service is used by Angular to allow real-time live development of your MPages through built in proxy capabilities. Configuration of the Angular proxy functionality is described in the Project Setup documentation.
Some of our clients have built remote development workstations that have been configured with all of the tooling described on this page to allow MPage developers the tools they need to build MPages while still maintaining strict local workstation security policies. Developers simply access the development server/workstation with a remote desktop connection.
The following configuration provides reliable performance for up to 10 simultaneous developers.
- 4 Core Inel Xeon 2.20GHZ
- Windows Server 2019 Standard
- 32GB Memory
- 100GB HDD Space
Required Software
The following software needs to be installed on your development workstation/server.
- Node.js
- Microsoft Visual Code (or other TypeScript capable editor)
- Git command line executable
- Angular CLI
Node.js Installation
-
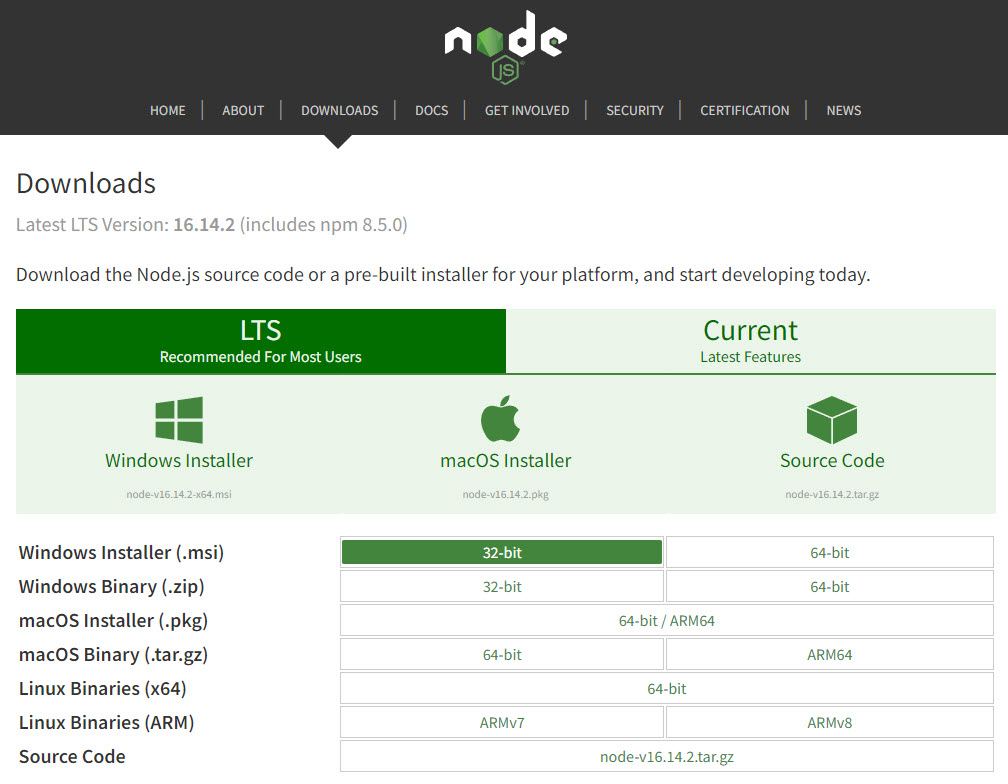
Navigate to https://nodejs.org/en/download/
to download and install the version of Node compatible with your computer. Windows users should choose
the Windows Installer (.msi) compatible with their Windows install. When in doubt, choose 32-bit.
WARNING: If you plan on supporting Internet Explorer MPages you must download Node 16.19.0 which can be downloaded from https://nodejs.org/download/release/v16.19.0/ . Later releases have dropped support for Internet Explorer and can only be used with Microsoft Edge. The most current version of Angular (version 15) will work with Node 16.19.0 allowing you to support both the newest Angular versions and older v12 installs.
- Once you run the installer, you will be greeted by the welcome screen. Click the Next button to get started.
- Accept the license terms and click Next.
- You will be prompted for an installation location. Make any desired changes to the installation location and click the Next button.
- On the Custom Setup window, simply click the Next button.
- Click the check-box to automatically install necessary tools on the "Tools for Native Modules" window if you wish to add tooling for Python and Visual Studio. (OPTIONAL)
- You are now ready to install Node.js. Click the "install" button and wait for the completed installation screen to appear and click the Finish button.
- After completion you will be shown a command prompt which will start the installation of the additional tools if you chose to add them. Let it run to completion.
-
You can test that Node is working by opening a command shell and typing:
node --version
NPM Installation
-
Since Cerner is still running IE, we need to make sure NPM is a version that can handle Angular 12. Type
in:
npm install -g npm@8.12.2
-
You can verify your NPM install by typing:
npm --version
- Be sure to keep your command prompt window open as we will be using it throughout the rest of the installation.
Angular CLI Installation
-
From your command prompt, install Angular CLI with the following command:
npm install -g @angular/cli
This will install the newest version of Angular allowing you the ability to develop MS Edge MPages as well as Internet Explorer MPages. Choosing between the two types of MPages is covered in the Project Setup documentation. -
You can see which version of Angular is installed on your PC by typing in:
ng version
- Close your command line.
Git Command Line Installation
-
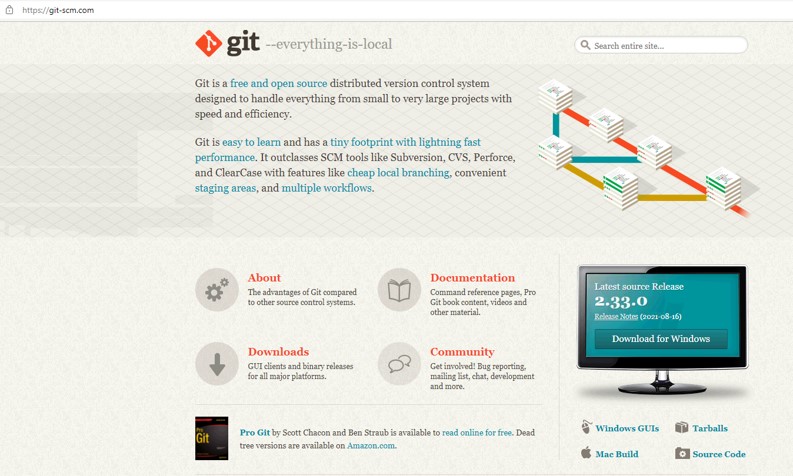
Navigate to https://git-scm.com and download the
latest release for your platform.
- Run the executable.
- When the license agreement screen displays, click the Next button.
- Choose your install folder (or keep the default) and click Next.
-
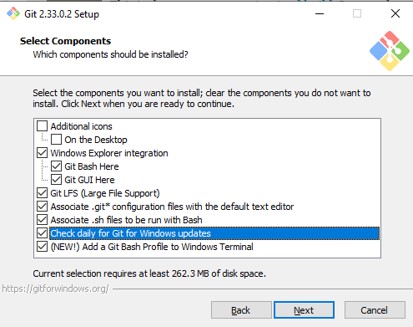
When prompted to select your components, select "Check Daily for Updates" and
"Add a Git Bash Profile".
Visual Studio Code Installation
Visual Studio Code is a powerful and free source code editor developed by Microsoft suitable for developing MPages with Angular.
- Download the Visual Studio Code installer from https://code.visualstudio.com.
- Run the Installer and follow the prompts. You can keep the defaults until you see the "Select Additional Tasks" screen.
-
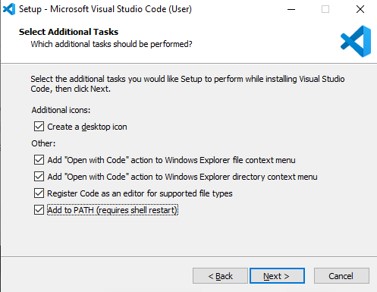
On the "Select Additional Tasks" screen, you can check all the boxes as shown in the screen below.
Visual Studio Code Extensions
Visual Studio Code Extensions add additional functionality to Visual Studio Code. There are thousands of extensions available to make development easier. For MPage development we are going to add the "ESLint" and "Angular Language Service" extensions to Visual Studio Code.
- Open Visual Studio Code on your development PC/Mac.
-
Click the Extensions button on the left-hand side of the screen.
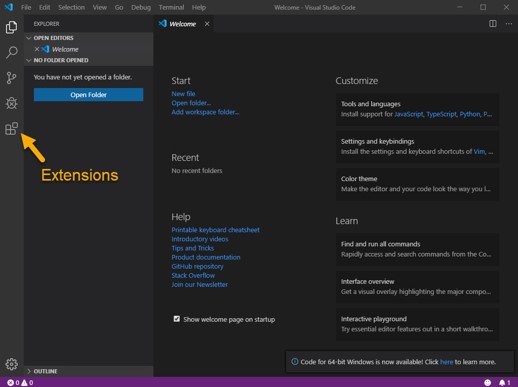
-
In the search box that appears, type in eslint. You should see a list of extensions appear. Choose ESLint by
Dirk Baeumer and click the green Install button.
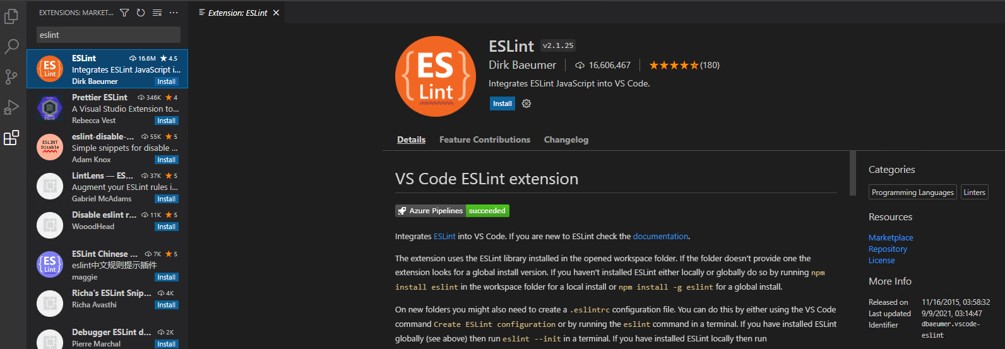
-
Open a new command line window and type in the following line to install eslint:
npm install -g eslint
You can close the command line when installation completes. -
In the Visual Studio code extensions screen, search for "angular language service" by Angular and click
the green "install" button.
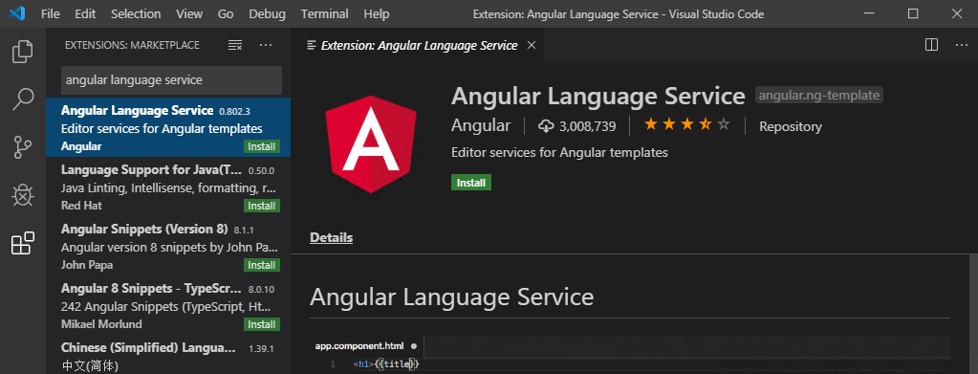
Change Your Visual Studio Code Default Terminal
Visual Studio Code will default to PowerShell on Windows for your command terminal. While this is a great option, many of you may not have the security setup to run scripts from PowerShell. You can stick with PowerShell or change your default terminal to a simple command prompt.
- From the “File” menu, choose “Preferences” followed by “Settings”. You will see a new window appear.
-
In the search box, type in “default profile windows” and switch the value of Terminal > Integrated > Default
Profile: Windows value to “Command Prompt”

- Any new terminal sessions you open in Visual Studio Code will now use the MS-DOS command prompt.
Sign up for GitHub and npmjs
Your Clinical Office package is a private package hosted through GitHub and provided with the Node Package Manager. Rather than using private packages hosted through npmjs.com which would cost you $7/month per user, the GitHub method in use is completely free. You do however need a npmjs.com free account to download Clinical Office.
For this reason you will need to have a free GitHub account as well as a npmjs account. Along with your Clinical Office license, using GitHub for your MPage projects is a fantastic way to back up and share code between your development team.
- If you do not already have a GitHub account, navigate to https://github.com and set up a new account for yourself using the “Sign up” button in the top right corner.
- Next, navigate your web browser to https://www.npmjs.com and sign up for a new account.
-
Open a new command line window and type in:
npm login
-
Enter in your username, password and email address when prompted.
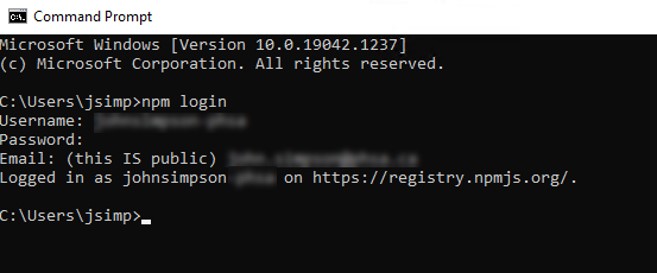
Once completed you see a message indicating that you are logged in to https://registry.npmjs.org/ - The previous command created a file in your users folder called .npmrc. You need to modify that file to include your Clinical Office:MPage Edition License token.
-
Open your Users folder and navigate to your name/username. In this folder you will see a new file called
“.npmrc”. This file was created when you logged into your npm account from the command line.

-
Open the .npmrc file in any text editor. You will see a line showing your login token as follows:
//registry.npmjs.org/:_authToken=npm_{{your npm private token value}}Below this line, add the following two lines making sure to replace the text "your_clinical_office_license_token_number" with the actual token number provided to you when you purchased your Clinical Office:MPage Edition license.
@clinicaloffice:registry=https://npm.pkg.github.com/
//npm.pkg.github.com/:_authToken=your_clinical_office_license_token_number
- Save your .npmrc file and your system configuration is now complete.
Next Steps
If your site has already installed the Clinical Office:MPage Edition CCL scripts, you may start developing your MPage by following the instructions in the Project Setup documentation. This documentation will guide you on how to create a new MPage project.
If you have not installed the CCL scripts, please complete the CCL Installation first as the CCL runtime is required.
