Introduction to Angular - Project Structure
This lesson assumes that you have setup your development PC to run Angular using the steps found in the Developer PC Setup documentation. If you have not yet purchased your Clinical Office:MPage Edition license, you can still work through this introductory lesson after setting up your PC for Angular development. Simply skip steps 5-8 on the "Sign up for GitHub and npmjs" section in the PC Setup documentation.
Create a Project with the CLI
The Angular CLI (Command Line Interface) is a simple-to-use set of command prompt utilities for creating pieces of your Angular application. By using the CLI you can create new Angular applications, create components and other Angular classes as well as run a dev server and compile your application. Without the CLI, you would be responsible to write a significant amount of code to get your project started. The CLI greatly simplifies this.
Let's create our new project.
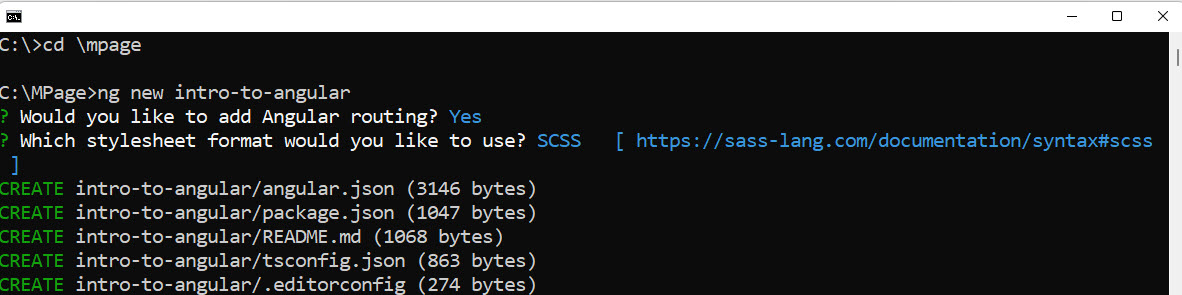
- Open a command prompt and navigate to a folder you wish to store your Angular application in. On my PC, I am storing my application in c:\Mpage\.
- Type in ng new intro-to-angular and press enter. The ng command represents the Angular CLI program itself, the word new is the command being issued (new Angular application) and intro-to-angular represents the folder name you wish to create.
- You will be prompted to add Angular routing. For this example choose Yes and press enter which will add the files necessary for routing to our project. Don't worry if you don't know what routing means just yet as it is covered later in this lesson.
- The final prompt will ask you which stylesheet format to use. Select SCSS from the list and press enter.
-
At this point your Angular application is being created. You should see a list of files being added to your
new folder scroll by on screen. The speed in which this step happens depends entirely on your PC and Internet
speed.
First Run
In the next steps we are going to launch our development server and view our Angular application.
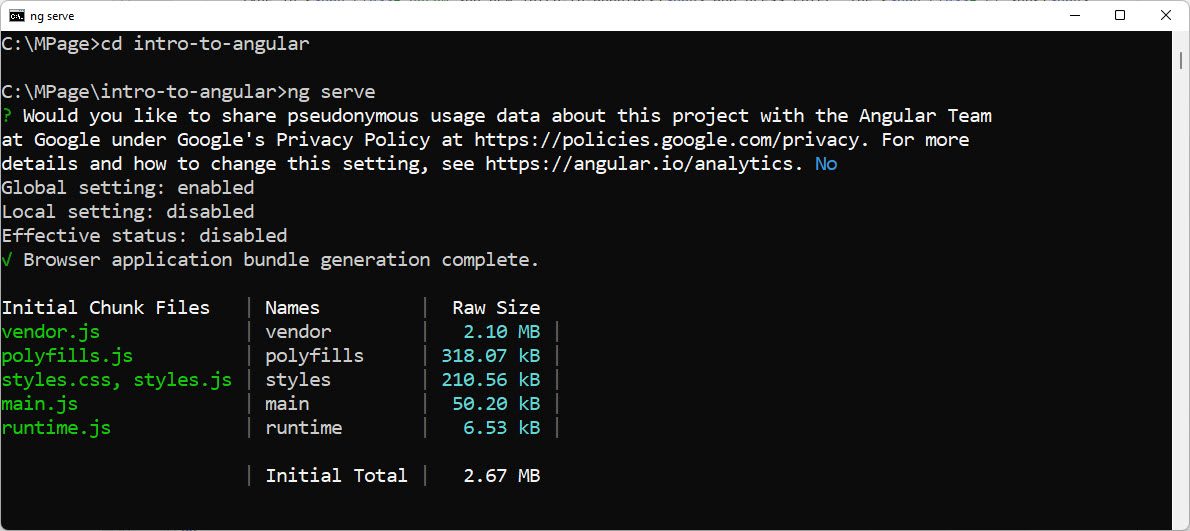
- From the same command prompt you have open, navigate to the newly created intro-to-angular folder by typing in cd intro-to-angular and press the enter key.
-
Launch the development server by typing in ng serve and press enter. On first
run you will see a short delay while files are compiled. Once ready you will see the message
"Browser application bundle generation complete." along with some bundle sizes. At this point, your application
is running on the development server and can be viewed in your browser.
-
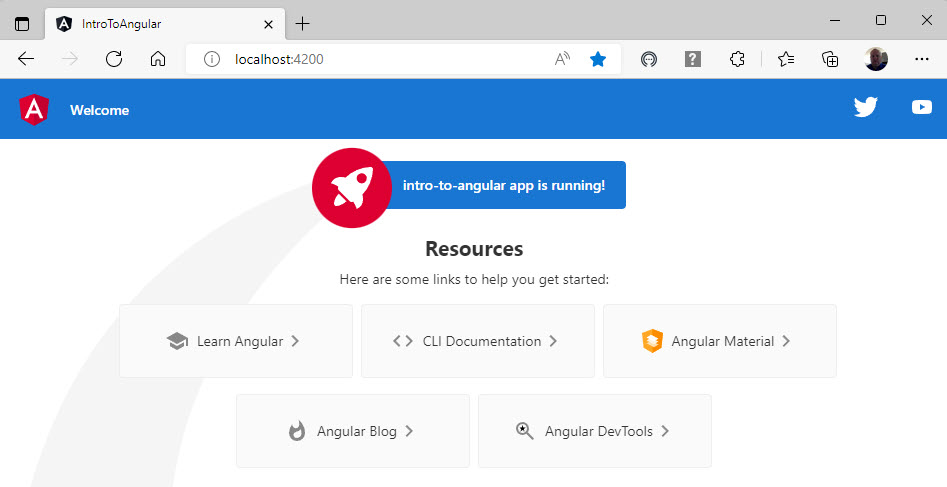
Open any web browser other than Internet Explorer on your PC and navigate to
http://localhost:4200. You should see the default Angular web page.
More on ng serve
The default port of the Angular development server is 4200. You can change this to another value by using the --port= option on your ng serve command line statement.
You can also have the page open automatically in your browser by adding the --open option to ng serve
In the example below we are running our development server on port 1971 and automatically opening the web browser to http://localhost:1971 once the server is ready.
ng serve --port=1971 --open
If at any time you wish to stop your development server, simply return to your command prompt and press CTRL + C.
Project Structure
The final step of this section is to open our Angular application in Visual Studio Code and take a look at the files created by the Angular CLI.
- Open Visual Studio code and from the File menu select Open Folder. Navigate to your new project folder and click the Select Folder button.
- You may be prompted to trust the authors of the files in the folder. If so, click the Yes, I trust the authors button.
-
The explorer panel located on the left side of the screen should be displaying the folders and files that make up your project as shown in the image below.
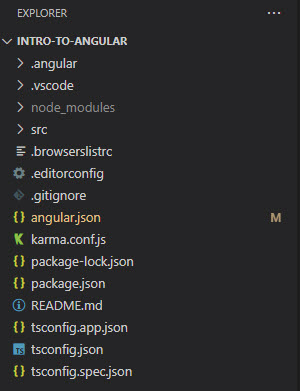
- The .angular and .vscode folders can be ignored.
- node_modules contains all the libraries you need to compile your Angular application. This folder contains approximately 300MB of files many of which will never be used in your application. If needed in your application you can directly import the library into your code and use it. Any new packages you install with NPM will also be stored in node_modules.
- the src folder contains all the custom code that makes up your Angular application.
- .browserslistrc lets you set up a list of compatible web browsers you wish to allow access to your Angular application. Angular 12 is the last version of Angular to support Internet Explorer, and it has to be explicitly enabled in the .browserslistrc file.
- .editorconfig is used for editor configuration. You should not have to modify this file.
- The .gitignore file lets you define rules to exclude files or folders from being stored on GitHub. The node_modules folder is just one item which is excluded when your project is copied to GitHub as the NPM tool will re-install the files when cloning your project. If GitHub is a new concept to you, don't worry about it right now as we discuss GitHub in another lesson when working with the MPage GitHub templates.
- angular.json is a JSON formatted file responsible for much of the configuration of your Angular application. You may never have to modify anything in this file except the "budgets" values. The "budgets" section of the JSON file let you control the maximum compile size of your application before the compiler throws an error. The default "maximumWarning" is "500kb" and the "maximumError" is "1mb". You may have to increase these sizes as you add third party libraries to your code.
- karma.conf.js is a configuration file for the Karma runtime testing utility. It will not be covered in any of our training as other documentation exists online.
- The package-lock.json file should not be modified.
- package.json is the most important configuration file in your Angular application as it is responsible for all the versioning of all dependent libraries and packages; including the version of Angular.
- README.md gives you a place to write a "read me" file to discuss your Angular application.
- tsconfig.app.json and tsconfig.spec.json contain TypeScript configuration options for your application. You should never need to modify this file.
- tsconfig.json allows fine-tuning of the compilation of your application as well as adherence to the TypeScript rules. The "target" value can be changed to control which set of web standards will be used in your compiled application. If compiling for Internet Explorer support using Angular 12, you could set this value to "es5" to force compatability with IE and Edge in the same bundle. You won't have to worry about this if using our ie-mpage and edge-mpage GitHub templates.
One of the great things about the project structure above is that your PC can have the newest version of Angular installed while at the same time allowing you the ability to maintain projects using older versions. Any MPages you develop using our ie-mpage GitHub template is restricted to Angular 12. This is set up in the package.json file meaning that the Angular 12 packages will be installed in the project node_modules folder.
Source Folder Structure
The src folder is where you will store all of your project source code and assets.
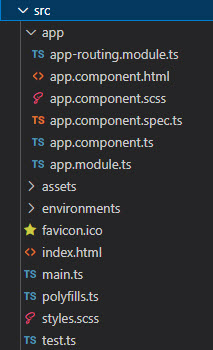
- The app folder contains your project source code. We will cover the contents of this folder after explaining the other folders/files in the src folder.
- The assets folder is used to store assets such as images, sound files or any other media you wish to have bundled with your Angular application at compile time.
- The environments folder contains two files (environment.prod.ts and environment.ts) which allows different usage depending on how your application is being run (dev server vs. compiled). You should not need to modify these files however your individual project use case may require it (I've never had to change these files).
- favicon.ico is an icon formatted file that is displayed next to the title of your Angular application in the web browser. This will never be seen in an MPage setting, so it can be safely ignored.
-
index.html is the main web page that is opened in your browser when you load an
Angular application. The generated page below will be the same for every newly created Angular application
using the CLI. You can safely change the title if desired. The <app-root></app-root> element represents
where your Angular application will be bootstrapped into the web page. Any content you add before and after
this will display on the page inline with your Angular application.
<!doctype html>
<html lang="en">
<head>
  <meta charset="utf-8">
  <title>IntroToAngular</title>
  <base href="/">
  <meta name="viewport" content="width=device-width, initial-scale=1">
  <link rel="icon" type="image/x-icon" href="favicon.ico">
</head>
<body>
  <app-root></app-root>
</body>
</html>
If you compare the standard Angular index.html to the ones found in the ie-mpage and edge-mpage GitHub templates you will notice that the MPage templates have significantly more code designed to support Cerner MPage integration. While you can create an Angular MPage from scratch by adding the correct content it is recommended that you use the provided templates. - The main.ts file contains the code necessary to bootstrap your Angular application. This file is built by the Angular CLI and should not require any changes by you.
- polyfills.ts was traditionally used to support compatibility with older web browsers. Now the usefulness of this file is limited, however it is handy for adding non-TypeScript supported JavaScript files. We use this method for adding the iframe-resizer library when delivering MPages as Cerner MPage Components.
- The styles.scss file is where you will store all of your application level custom SCSS style sheets. In addition to this file, Angular allows you the ability to define localized style sheets for any components you create.
- test.ts is used by the Jasmine testing tools. It will not be covered in our training.
Application folder structure
The app sub-folder found in the src folder contains the code for your components, classes, data services and any other Angular content you may create. As you create your own components, Angular will create sub-folders for each of your component names.
Our app folder currently contains a module for application routing (app-routing.module), a base application component (app.component) and our core application module (app.module). As you can see from the folder structure, components are split into multiple files (.html, .scss, .spec.ts, and .ts). Each of these files is explained below.
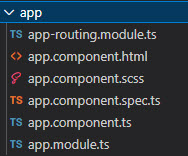
- app-routing.module.ts is used to assign routing destinations to components in your Angular application. Angular routing lets you create multiple pages inside your application. We will cover routing in detail later in this lesson.
-
The app.component files represent the starting component for your Angular application.
All presentation of your application content starts inside this component. This is done by adding custom
components inside the app.component.html file.
- app.component.html provides the HTML presentation layer. Inside this file you can add any valid HTML as well as Angular specific functionality such as variable binding, directives and custom components.
- app.component.scss represents SCSS (Cascading Style Sheet) attributes specific to the named Angular component. Any SCSS defined in this file only exists in the context of the app.component.html file. You can choose to add your SCSS definitions in this file for the component or create SCSS definitions that are global to your application in the styles.scss file previously discussed.
- app.component.spec.ts is designed to be used with the Karma/Jasmine testing utilities. These files are not taught in our lessons and will not be mentioned again.
- app.component.ts represents the TypeScript code associated with your component. This is where your component logic and data variables will be stored.
- The app.module.ts file contains the required imports and declarations for your Angular application. Any components you create in the Angular CLI will be imported into this file as well as any Angular functionality. For example, your application currently does not have support for Angular Forms. To use this functionality you would need to import the correct packages into your app.module.ts file.
Summary
As we can see from our base application, the Angular CLI creates a number of files for us. Thankfully the majority of these files can be ignored while we begin our journey learning Angular. As your skills advance you may tweak some of these files to your specific needs, but overall most of your work will be contained to the src folder.